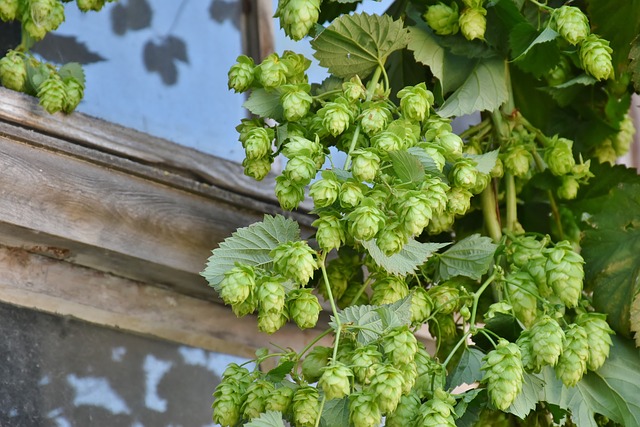
The ability to grow hops is all about your location. The ideal place to grow hops is in the latitude between 35 and 55 degrees north. This limits the production commercial of hops to the northern climate.
It is important to research available hop varieties and consider the type of beer you like to drink. You might consider purchasing a rounded array of hops so that you have the most versatility when selecting beer types or you may have very specific beer tastes that will guide you.
Hop Union offers an extensive listing of hop varieties.
Choosing a Location to Grow Hops
Once you have received your hops (by mail order or from the nursery), it is important to choose the right location for them to be planted.
Hops are rhizomes and therefore will grow underground and spread a decent bit over time. You want to make sure you plant them somewhere permanent that allows enough room to grow.
Hops like to grow straight up into the air, so you also need to make sure that there is a strong support system at the height of 20-30 feet available for the hops to grow on.
How to Plant and Care for Hops
Plant your hops in March, or once the soil is workable (you can grow them in a pot until this point). Work the soil with plenty of organic compost as hops will consume a lot of as they begin to grow. Keep the hops evenly watered (daily during the hot/dry part of the summer) and don’t water the leaves as this can promote mildew growth. The soil should be loose and free of rocks, sandy loam is ideal. Fertilize throughout the season to promote growth.
Controlling Pests
The first and most common pest you will find on your hops are aphids. You will often see lady bugs on your hops and they will manage the aphids, however you may want to spray with soapy water if the aphids are thick.
A second pest that may visit your hops are Asian lady beetles. Depending on the size of your hop yard these are something you can hand manage by picking larvae off the hop, you can also manage these with soapy water. It is important to manage these beetles as they can cause property damage and will try to hibernate in your home over the winter. These beetles look like lady bugs, however they are orange and lack black spots.
A last common pest you may find on our hops are caterpillars. The caterpillars will bore into the hop flowers (cones) and damage the final product. These can be hand managed by inspecting the leaves and cones and removing any infested parts. You can learn more about hop pests and management at Fresh Hops.
Harvesting Hops
The last step in growing hops is the harvest. You will cut the vines (known as bines when talking about hops) at the ground and pull them down. Remove the cones from each bine and lay them out in a single layer to dry.
It takes about three days to dry hops in a warm dry location. Once dry the hops can be packaged, air-tight and stored in the freezer until ready to use. It can be most useful to package them in one ounce packages for use when brewing.
Getting Your Hops Ready for Winter
To winterize your hop plants compost and mulch around the rhizomes that are still in the ground. After the second year you may need to separate or prune your hop rhizomes. This is best done in March and the cuttings will be ready to plant elsewhere in the garden.


The Hops is really a very beautiful plant! I had no idea! One of these days I shall get a sip of your homemade beer xox