Have you ever made homemade yogurt before? If not, you should definitely try! It’s so easy, and doesn’t really require any special equipment or specialty ingredients.
Why Make Your Own Yogurt?
- It’s cheap
- It’s easy
- Homemade yogurt is full of good probiotics
- Once you make it, you no longer have to buy store bought yogurt!
Please bear with me as this is a very non-technical process. I choose not to use a thermometer when making yogurt. I will add temperatures so that you can use one, but I will be explaining how to make yogurt by using touch and “feeling” how hot things are.
That just goes to show you how easy this can be!
How to Make Homemade Mason Jar Yogurt
Equipment needed:
- A saucepan (get it here)
- 2-4 mason jars with lids (get it here)
- a roasting pan (get it here)
Ingredients:
- Whole milk (you can make anywhere from a few cups to a gallon)
- Approx. 1 cup plain organic yogurt – use store bought or a cup from you last batch (read ingredients. Make sure it’s not full of preservatives.)
Instructions
Ready? Let’s make some yogurt!
First, turn your oven on to the lowest setting possible. Set the yogurt out on the counter.
Prepare your clean jars by setting them in a roasting pan. Set the lids nearby so they are ready, but do not put them on yet.
Meanwhile, pour the milk into an appropriately sized saucepan and put over medium heat. You can use as much or as little milk as you like. I generally do about 1/2 gallon. Bring the milk to just before boiling, but do not boil it! Remember to stir it prevent scalding. If you are using a thermometer, the milk should be heated to about 160 degrees.
Once the milk has heated enough, remove it from the heat. Let it cool until it’s still warm but just cool enough to hold your finger in comfortably. Don’t let it cool any more than this! For those using a thermometer, it should be about 120 degrees.
As soon as the milk is at the right temperature, whisk in the yogurt. I add about 1 cup per gallon. That means, if I am only doing 1/2 gallon, I add 1/2 cup of yogurt. You can adjust your measurement accordingly, but don’t worry about it too much. This is not an exact science.
Pour the milk into your clean mason jars. Promptly put the lids on the jars. Use a cup to surround the jars with hot water, filling the base of the roasting pan.
Turn the oven OFF and set the roasting pan (with jars inside) in the oven. Turn the oven light ON. Let the jars sit for 8-10 hours. I usually do this overnight so the yogurt is ready in the morning.
How to Store and Eat Homemade Yogurt
When your yogurt is properly cultured, you can simply set the jars in the fridge.
If you want greek yogurt:
Place a strainer over a large bowl. Drape a thin kitchen towel inside the strainer. Pour the yogurt onto the towel and fold over the towel or tie the ends with a rubber band. Let the yogurt strain for about 2 hours, depending on how thick you want your yogurt. Check periodically. Remove the strained yogurt from the towel and store in a glass jar.
Don’t discard the liquid. This is whey and can be used for many things in the kitchen!
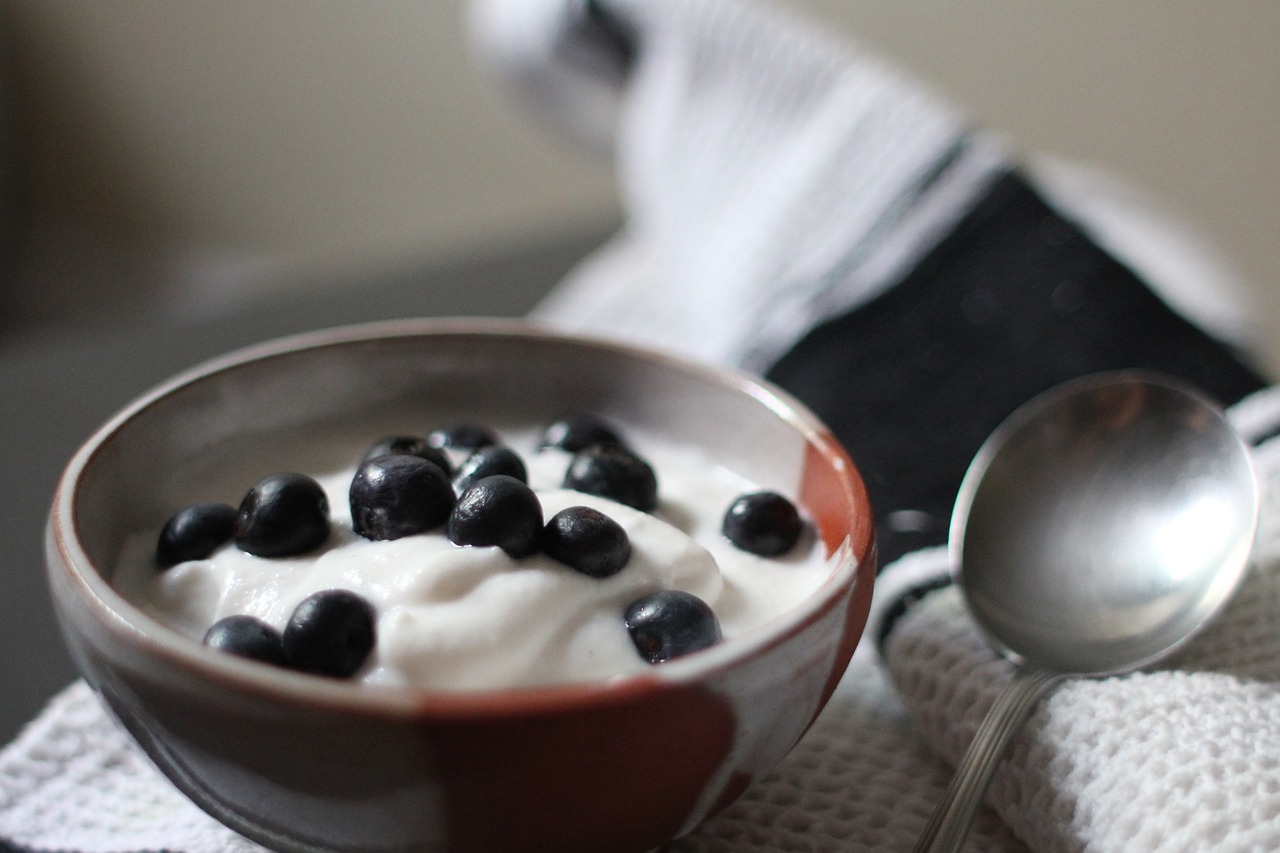
How to flavor homemade yogurt:
- Add some natural fruit preserves
- Add fresh or frozen fruit (pureed or not)
- Add some honey (get it here)
- Add some grade B maple syrup (get it here)
We also like to mix in homemade granola!
Have you ever made your own yogurt?

Drawing from years of clinical experience working with children, teens, adults, and families, Vanessa writes about psychology, communication, emotional wellness, personal growth, and the patterns that shape human behavior. Her work blends evidence-based mental health principles with practical, accessible insights designed to help readers better understand themselves and their relationships.
Vanessa incorporates trauma-informed, attachment-focused, EMDR, and play therapy approaches in her clinical work. As a Registered Play Therapist™, she has advanced training in helping children communicate, process emotions, and heal through developmentally appropriate therapeutic interventions.
When she isn't providing therapy, supervising clinicians, or running a counseling practice, Vanessa enjoys exploring the intersection of psychology, storytelling, healing, and personal transformation through writing and education.
- Emotional Distance vs. Healthy Space: How to Tell the Difference - July 2, 2026
- What Does “I Need Space” Really Mean in a Relationship? - June 20, 2026
- Why Video Games Aren’t Ruining Your Child’s Brain - June 7, 2025